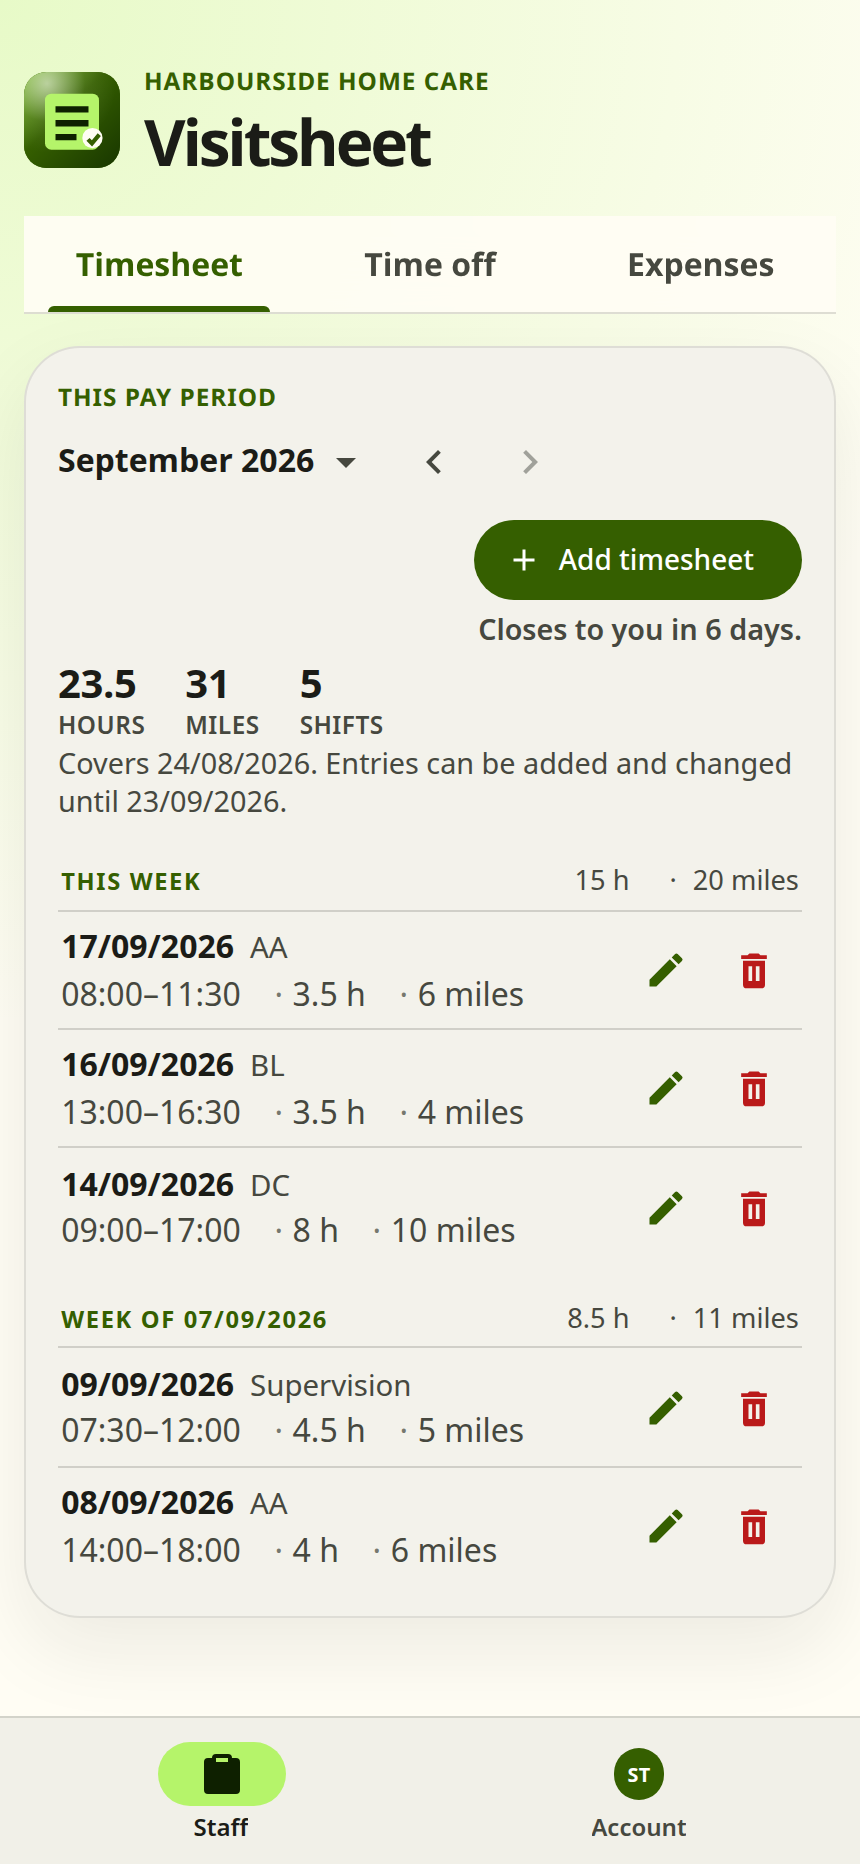
The Staff page has three tabs: Timesheet, where you record your work; Time off, where you ask for holiday; and Expenses, where you claim back money you have spent. Each tab shows the pay period you are in, with a total for it above the list.
Example screen
Your link and your password
Sign in
Keep the message your link came in. It does not run out, and it signs you in again whenever you need it.
Optional
Add Visitsheet to your phone
Visitsheet can sit on your home screen with your other apps, so it opens with one tap and you do not have to find the link each time. It is a one-off, and you can carry on using Visitsheet in your browser instead.
After each visit
Record a visit
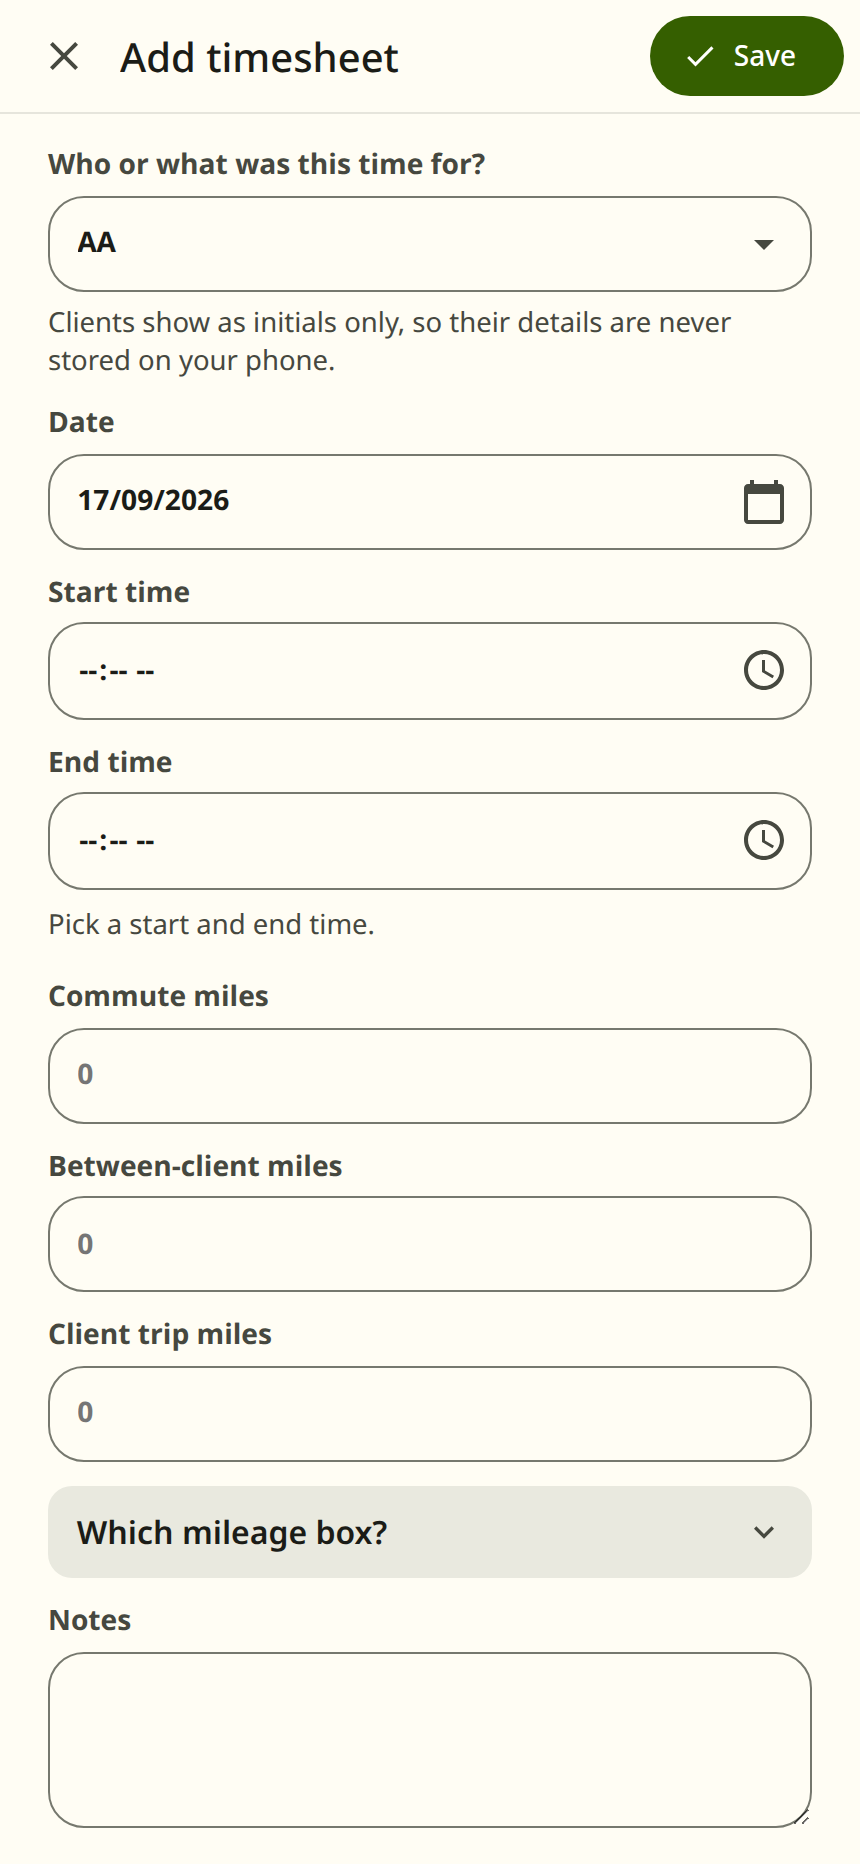
On the Timesheet tab, tap “Add timesheet”.
Choose who or what the time was for. Clients are listed by their initials. Training, admin and the other activities are in the same list.
Check the date, then pick the start and end times. Visitsheet works out the hours.
Put your miles in the right box: commute miles for getting to and from work, between-client miles for driving from one client to the next, and client trip miles for a journey made on a client's behalf. Leave a box at 0 if there were none.
Add a note if the office needs to know something about the visit. If you record client trip miles, please say where you went in the note.
Tap “Save”, then check the visit is in the list underneath, with its hours and miles added to the totals above. That is what tells you the office has it.
Example screen
The pay period runs from the 24th of one month to the 23rd of the next. The August 2026 period covers 24 July to 23 August, so 23 August is the last day to add a visit to it or change one. The line under the period's name gives the first day of the period and the last day you can add or change entries. In the last week the countdown appears under “Add timesheet”.
Made a mistake? Tap the pencil on the entry to change it, or the bin to remove it. A wide screen labels the two buttons “Amend” and “Delete”.
Spent money on the visit? Tick “Also log an expense for this visit” before you save, and the expense form opens with the client and date already filled in.
Holiday, sickness and other leave
Request time off
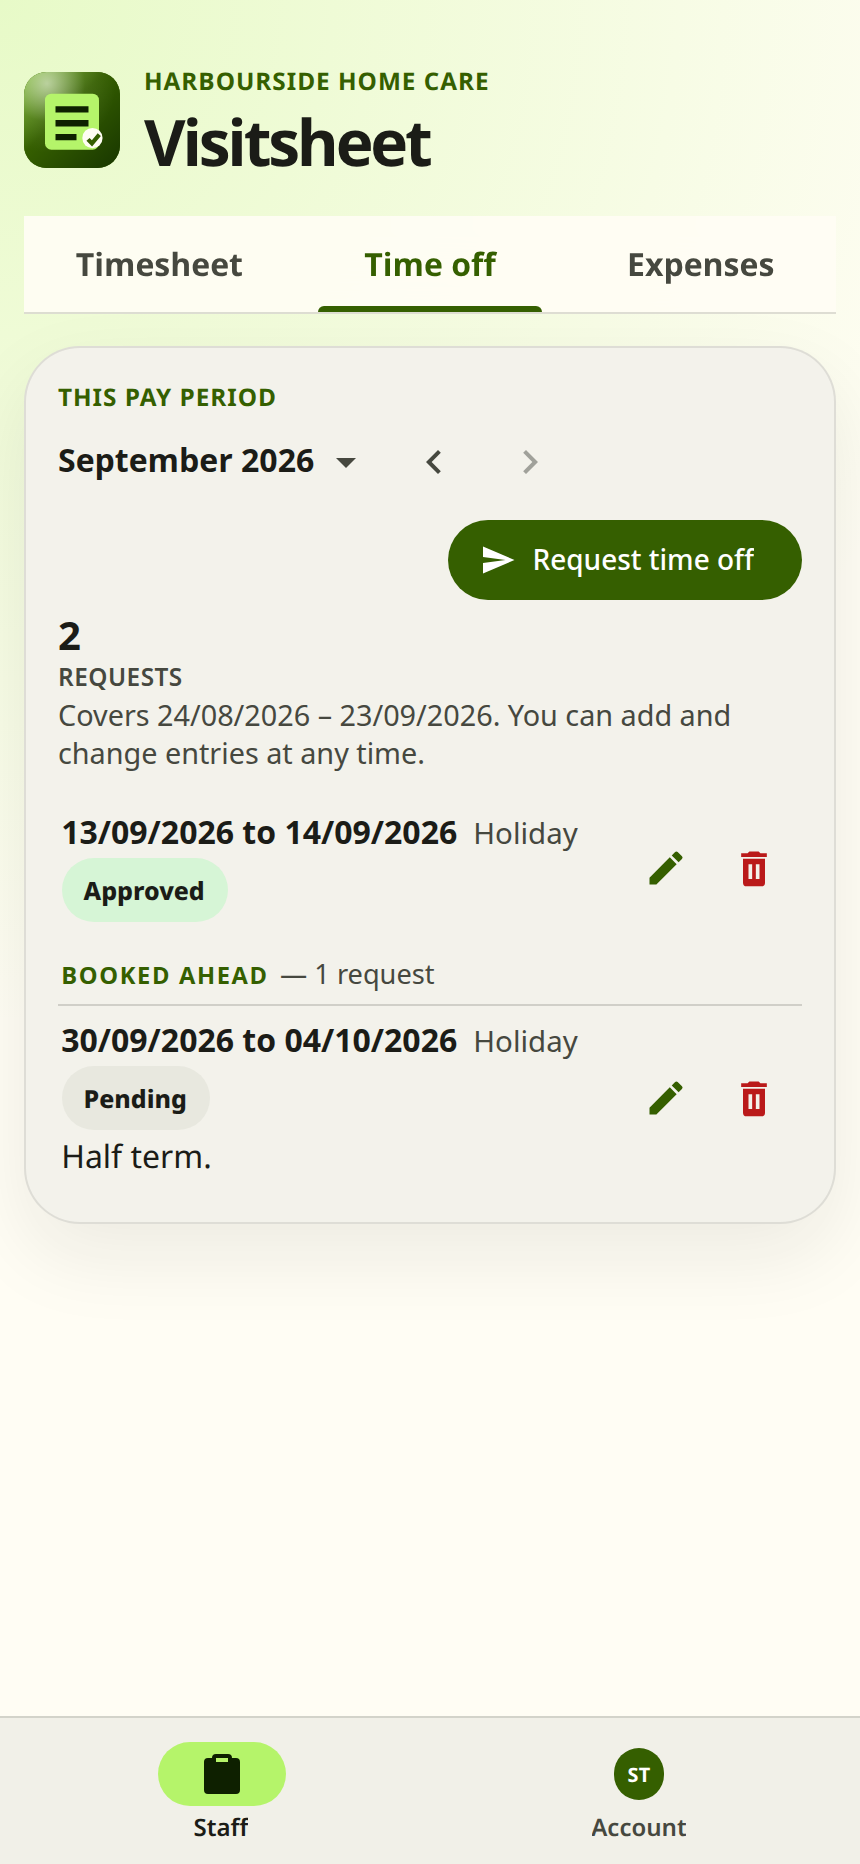
On the Time off tab, tap “Request time off”.
Choose the type: Holiday, Sickness or Other.
Pick the first and last day. For a single day, choose the same date for both.
Add a note if there is something an approver should know.
Tap “Request”, then check it is in the list underneath.
Example screen
Your request shows as Pending until an approver has looked at it, then as Approved or Rejected. If you amend one, an approver has to decide it again, because the days have changed.
Time off does not follow the pay period the way a timesheet or an expense does. You can amend or delete a request at any time, and record days you have already taken, even in a month that closed long ago.
Money you have spent
Claim an expense
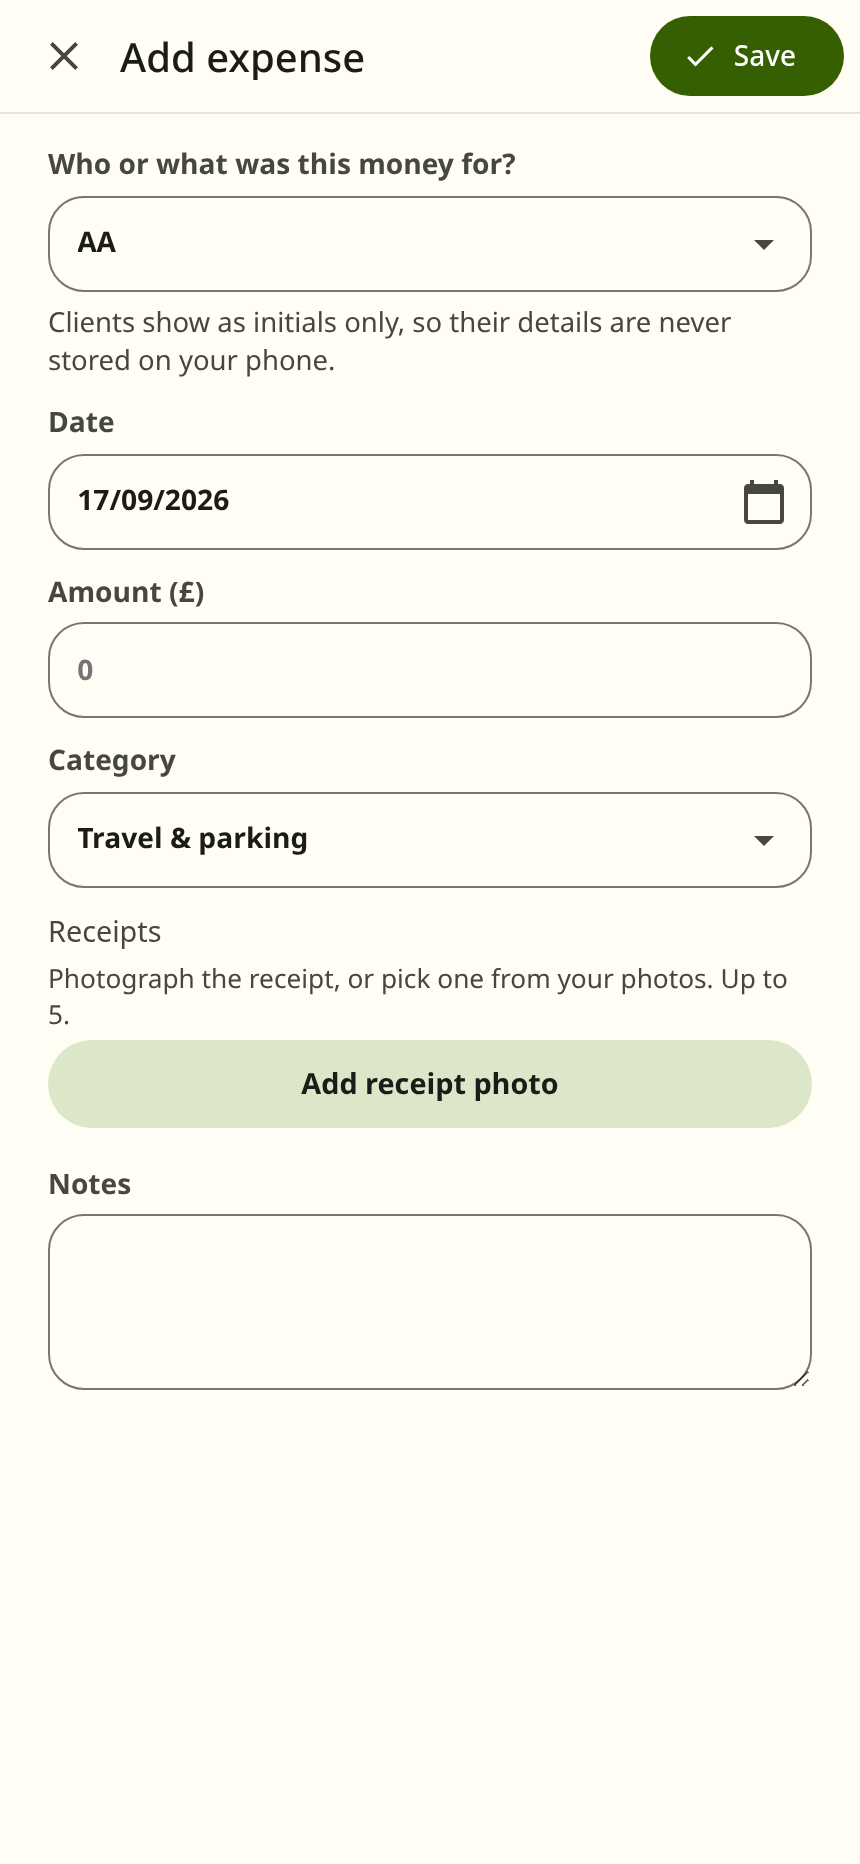
On the Expenses tab, tap “Add expense”.
Choose who or what the money was for: the client, if you spent it on their behalf, or the kind of work it was for, such as Admin or Training.
Check the date and enter the amount in pounds.
Choose the category: Travel & parking, Materials, Food & drink, Activity or Other.
Tap “Add receipt photo” and photograph the receipt, or pick a photo you have already taken. You can add up to five. Tap a photo you have added to see it at full size.
Add a note if the expense needs explaining, then tap “Save”. Check the expense is in the list underneath, with its amount in the total above.
Example screen
An expense follows its date as a timesheet does: the 23rd is the last day to add one or change it, and the countdown appears under “Add expense” in the last week.
Nobody approves an expense. It counts from the moment you save it, and is included in that pay period's payroll exactly as you entered it. An approver reads the expenses on their own page and will ask you if one needs explaining.
When something is not as you expect
Fix a problem
The pencil and the bin , labelled “Amend” and “Delete” on a wide screen, are shown on an entry until its date is closed, so look for the buttons rather than working it out from the date. If they have gone and you need the entry changed, tell the office: they can send a timesheet back to you to correct.
The 23rd closes the pay period. A visit to a client, and an expense against one, can be closed sooner than that: the office closes the calendar month it falls in for invoicing. Training and admin are on no invoice, so they stay open until the pay period closes. A closed entry is still there to read — the arrows under the period's name go back to an earlier period.
The office has found something wrong with one of your timesheets and returned it for you to correct. It is marked “sent back” with their reason, and its pencil is shown on it again, so you can change the figures after the period has closed. The date has to stay inside the pay period the shift was recorded in. Once you save it, it counts in the period's totals again.
The correction can still be refused. If the office has already finalised that period's payroll, or the shift was to a client and they have closed that month for invoicing, you are told why when you try to save. Tell the office and they will reopen it for you.
An expense is never sent back. If one needs explaining, an approver asks you about it instead.
With the current pay period. Time off booked for a later period is listed under the current one until that period starts, so you do not have to go looking forward for it.
Ask the office for a new link. Nobody can send you back the one you had, so they issue a fresh one: the old link stops working everywhere, and you choose a password again the first time you open the new one. That is the password every device then uses.
A new sign-in link does not touch your passkeys. They carry on signing you in as they did.
Yes. Your sign-in link works on every device you use, as many times as you need. To use Visitsheet on a computer as well as your phone, open the same link there and enter the password you already chose. Signing in on the computer takes nothing away from your phone.
A passkey signs you in with whatever unlocks your device: your face, your fingerprint or its PIN. There is no password to type. Set one up under Passkey on the Account tab. You never have to. Your link and password keep working, and they are the way back if a passkey is ever refused.
Where a passkey can be used is up to the phone or browser holding it. Some save it to an account that copies it to your other devices, and some let you sign in on a computer by scanning a code with your phone. Others keep it on the one device. The Account tab lists your passkeys and marks each one “backed up” or “this device”.
A passkey that works on a device does not mean you are already signed in there. On each device you open Visitsheet and choose “Sign in with passkey”, or open your link and enter your password.
Saving sends the entry to the office, so your phone needs a connection. If you see “Can’t reach Visitsheet just now”, the form stays as you left it: move to somewhere with a signal and tap “Save” again. Nothing is kept on the phone in the meantime, so do not close the form.
Whatever the reason, the check is the same one: the entry is in the list underneath the button, or it has not been saved.
Anything else, ask the office. They sent you your sign-in link, and they are who can send a timesheet back to you, reopen a closed period or issue a new link.
The other guide
How a month runs
For whoever prepares payroll and raises the invoices: checking work as it comes in, closing the pay period, finalising payroll, and closing the month for invoicing.